How to create and publish NPM Packages
The aim of this article is to learn what is npm what do we need to run/install npm packages and we will learn how we can create and publish a package to the npm registry and feel like a cool and badass developer 😎.
Table of Contents
What is NPM
What is npm again ? Well, NPM stands for Node Package Manager and as the authors define it on their website :
- npm is the package manager for Node.js. It was created in 2009 as an open source project to help JavaScript developers easily share packaged modules of code.
- The npm Registry is a public collection of packages of open-source code for Node.js, front-end web apps, mobile apps, robots, routers, and countless other needs of the JavaScript community.
- npm is the command line client that allows developers to install and publish those packages.
Our Package
For the scope of this article, we will get step by step of the process of creating an npm package and publish it on the npm registry so other developers around the world can use our package.
The package we are going to create is a simple CLI app that will accept an email as an argument and will check if that email has been found in public data breaches. To achieve this we will be making HTTP requests to an external API, the haveibeenpawned.com website’s API. The name of our package? pawnhub 🙄 😉
Requirements
To build our package we need the following
- A working Computer 💻 🤓 i will be using MacOS but the process is similar to all OS.
- A Code Editor 📜 (I use Visual Studio Code or WebStorm)
- NodeJS installed our system with NPM installed and
- Internet Connection
Getting Started
Install NodeJS
To install NodeJS on our system we can do it in many ways, i will demonstrate 2 of them.
Install from official website
Visit the official NodeJs website https://nodejs.org, press the download button
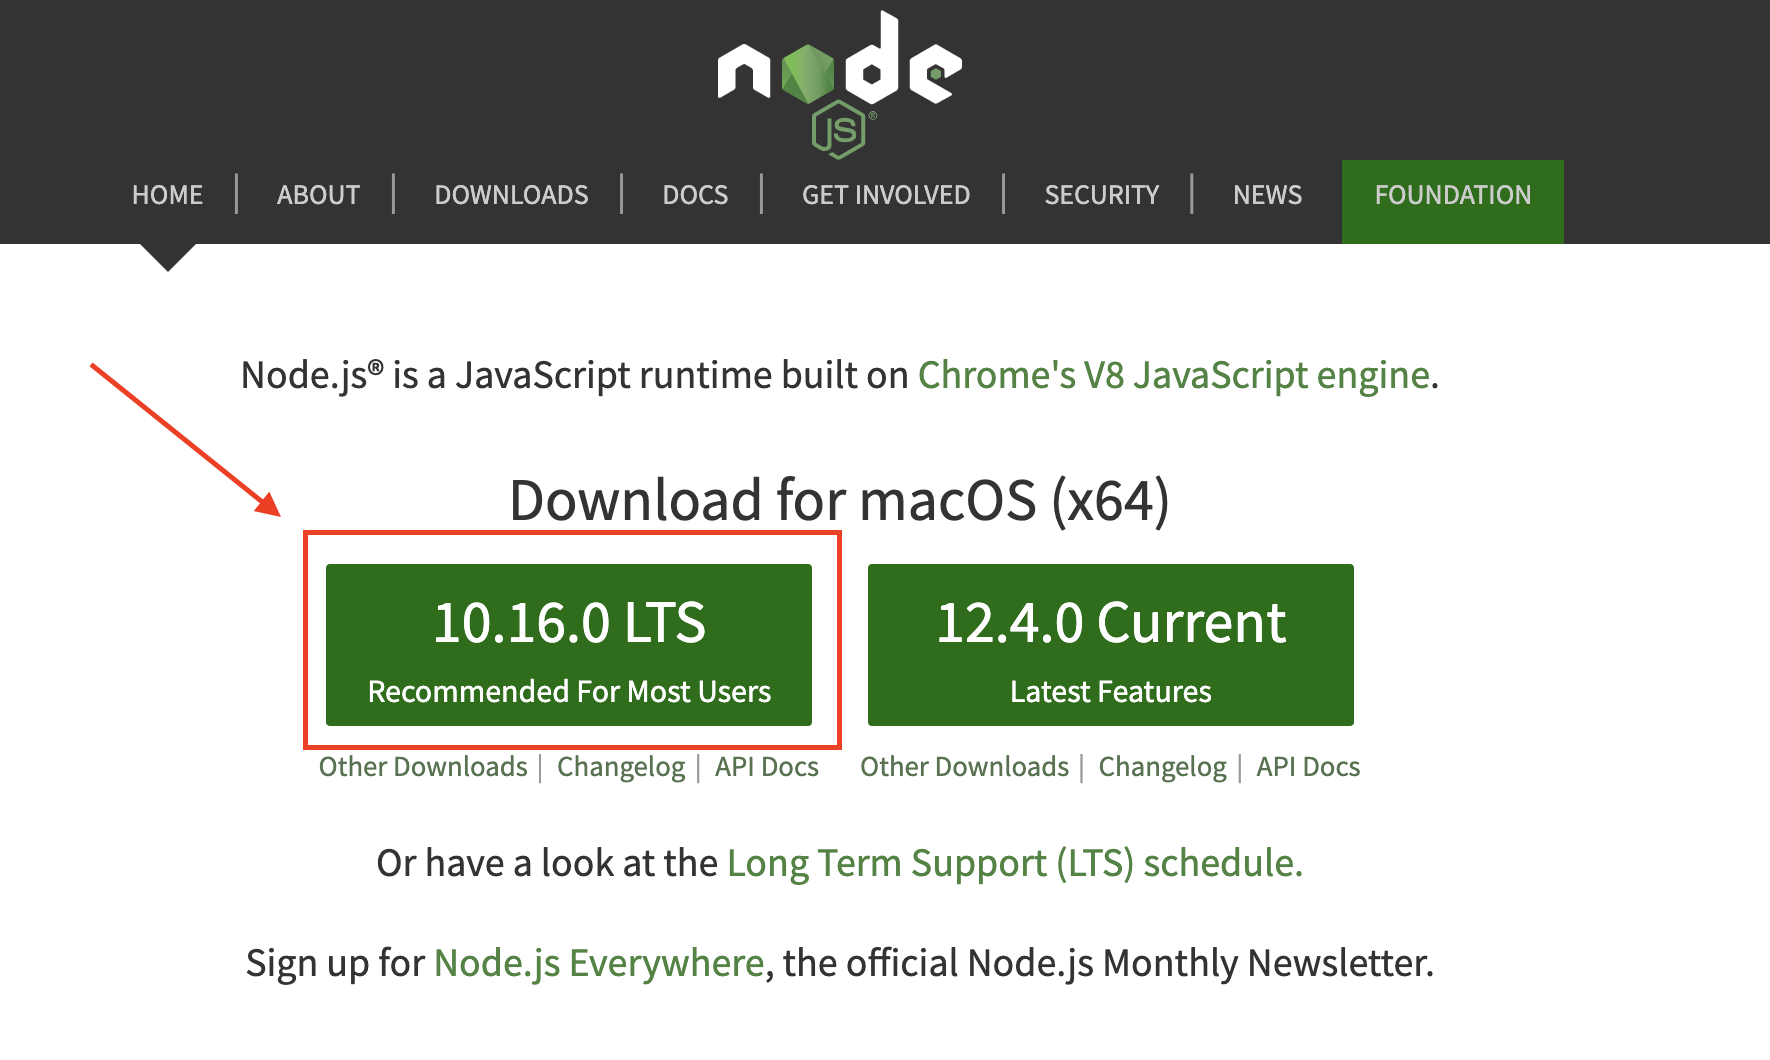
When the download is finished, open the file and follow the instructions to complete the installation. Doing so will install node and npm.
Install using homebrew
Homebrew is a package manager for MacOS or Linux.
First, we need to install Homebrew (if not already installed).
Open the terminal and run the following command:
/usr/bin/ruby -e "$(curl -fsSL https://raw.githubusercontent.com/Homebrew/install/master/install)"
This will download and install Homebrew for us.
Then run brew update to make sure Homebrew is up to date.
To install Node we just simply run the below command:
brew install node
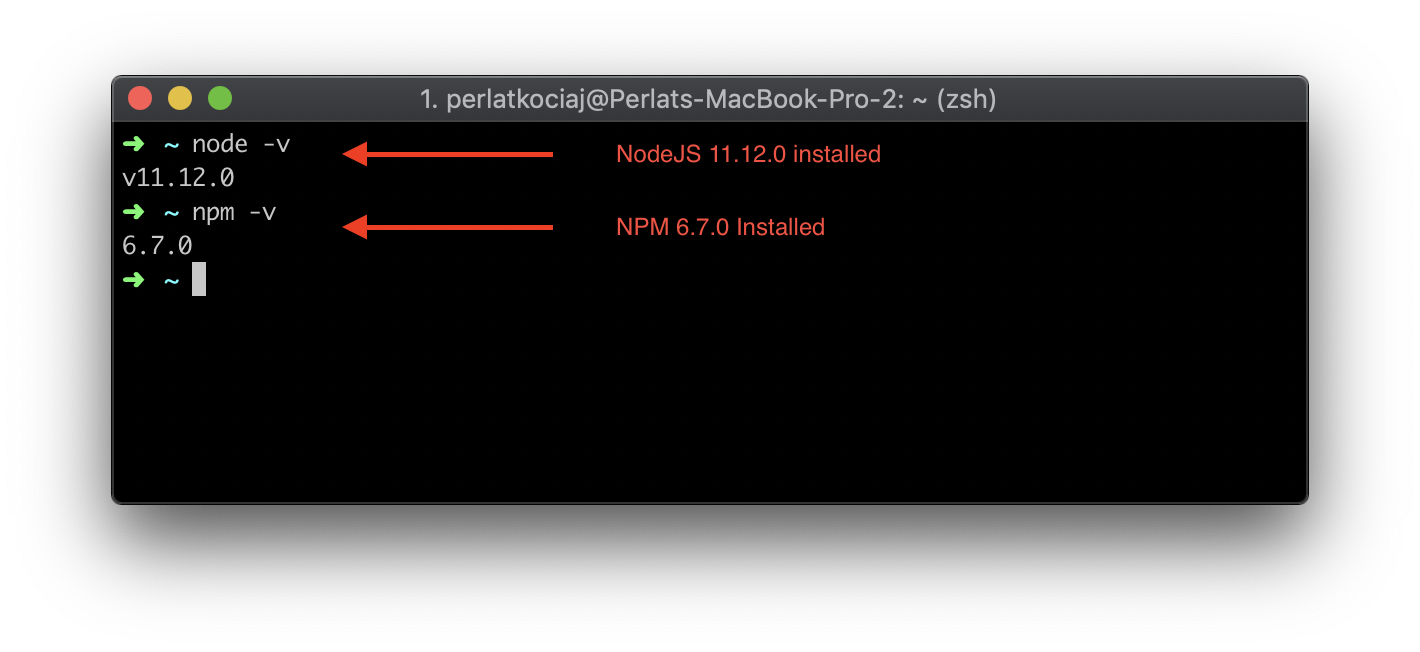
To confirm we have installed Node and NPM on our system, we can run the following commands:
node -v and npm -v it will display the version we have just installed .
Creating the Package
First, we need to create a directory for our project. I like to have all my projects in the ~/projects directory 🗂. Open the terminal and run mkdir pawnhub this will create a folder named pawnhub, then enter the directory cd pawnhub.
NPM Init
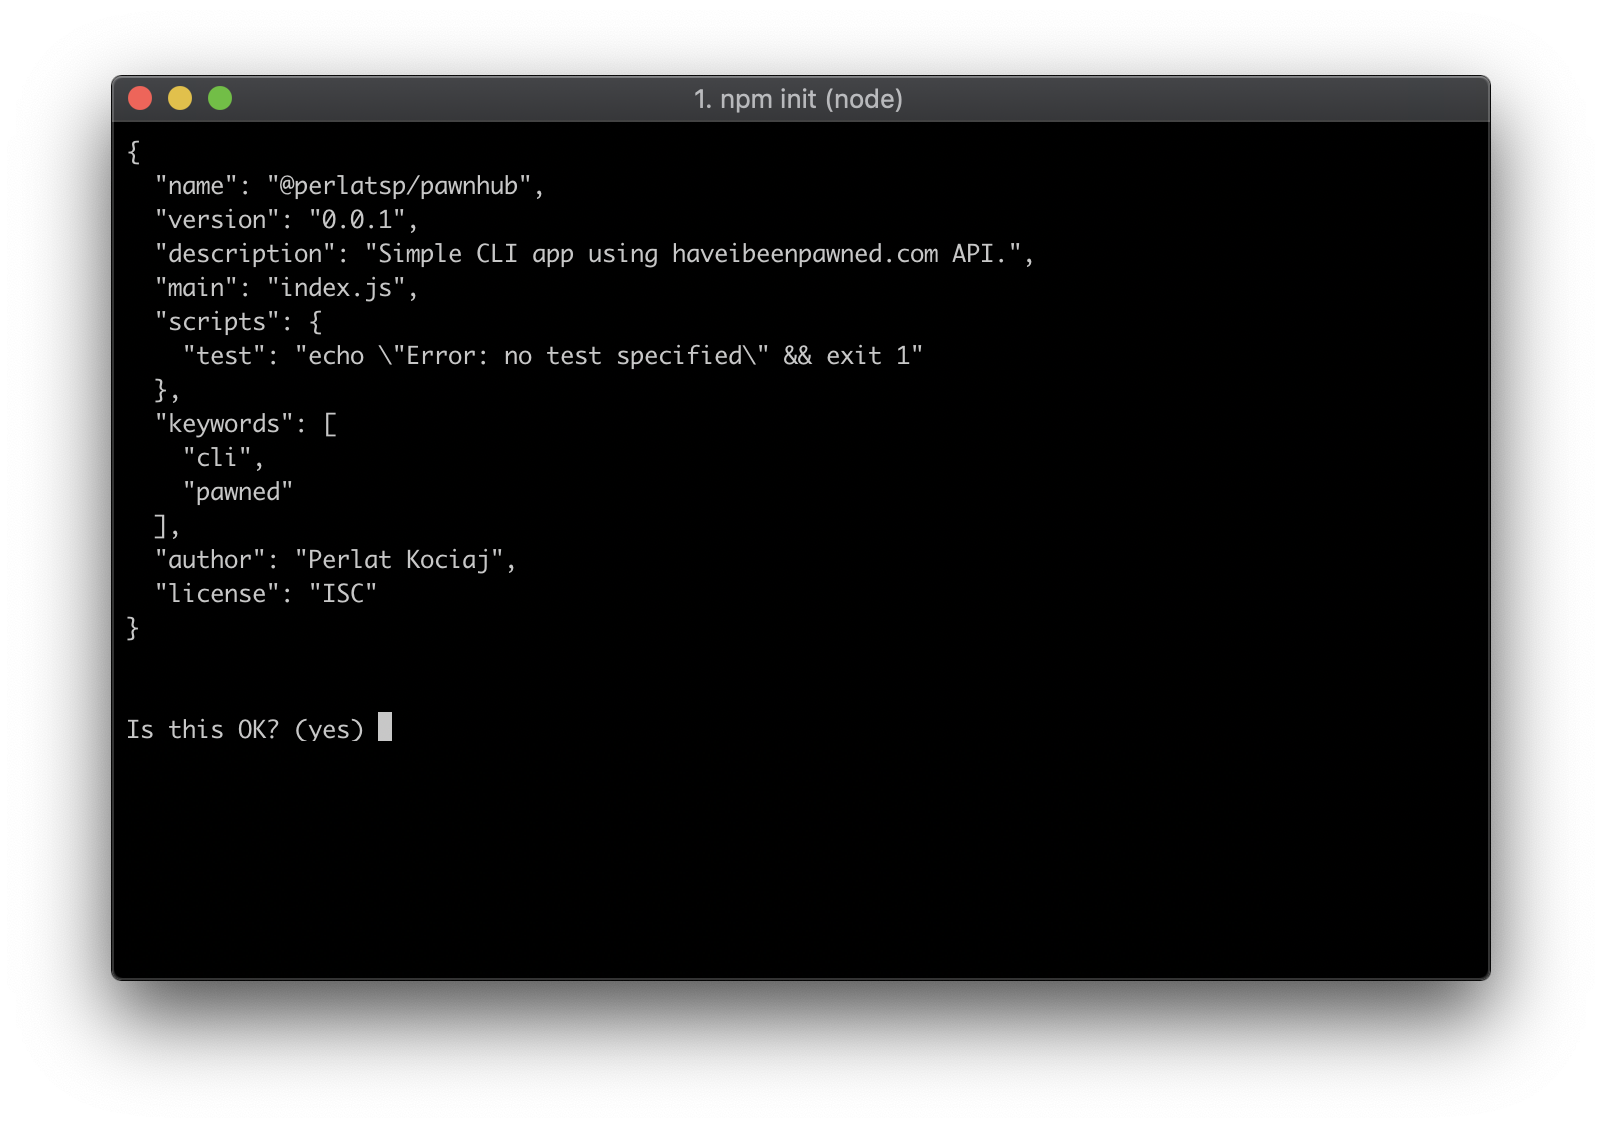
Now that we are inside our project directory, we need to initialize an npm project. We can do that by running npm init. This will start the interactive clip and ask us some information about our new package, such as the name, version, description, author, and license.
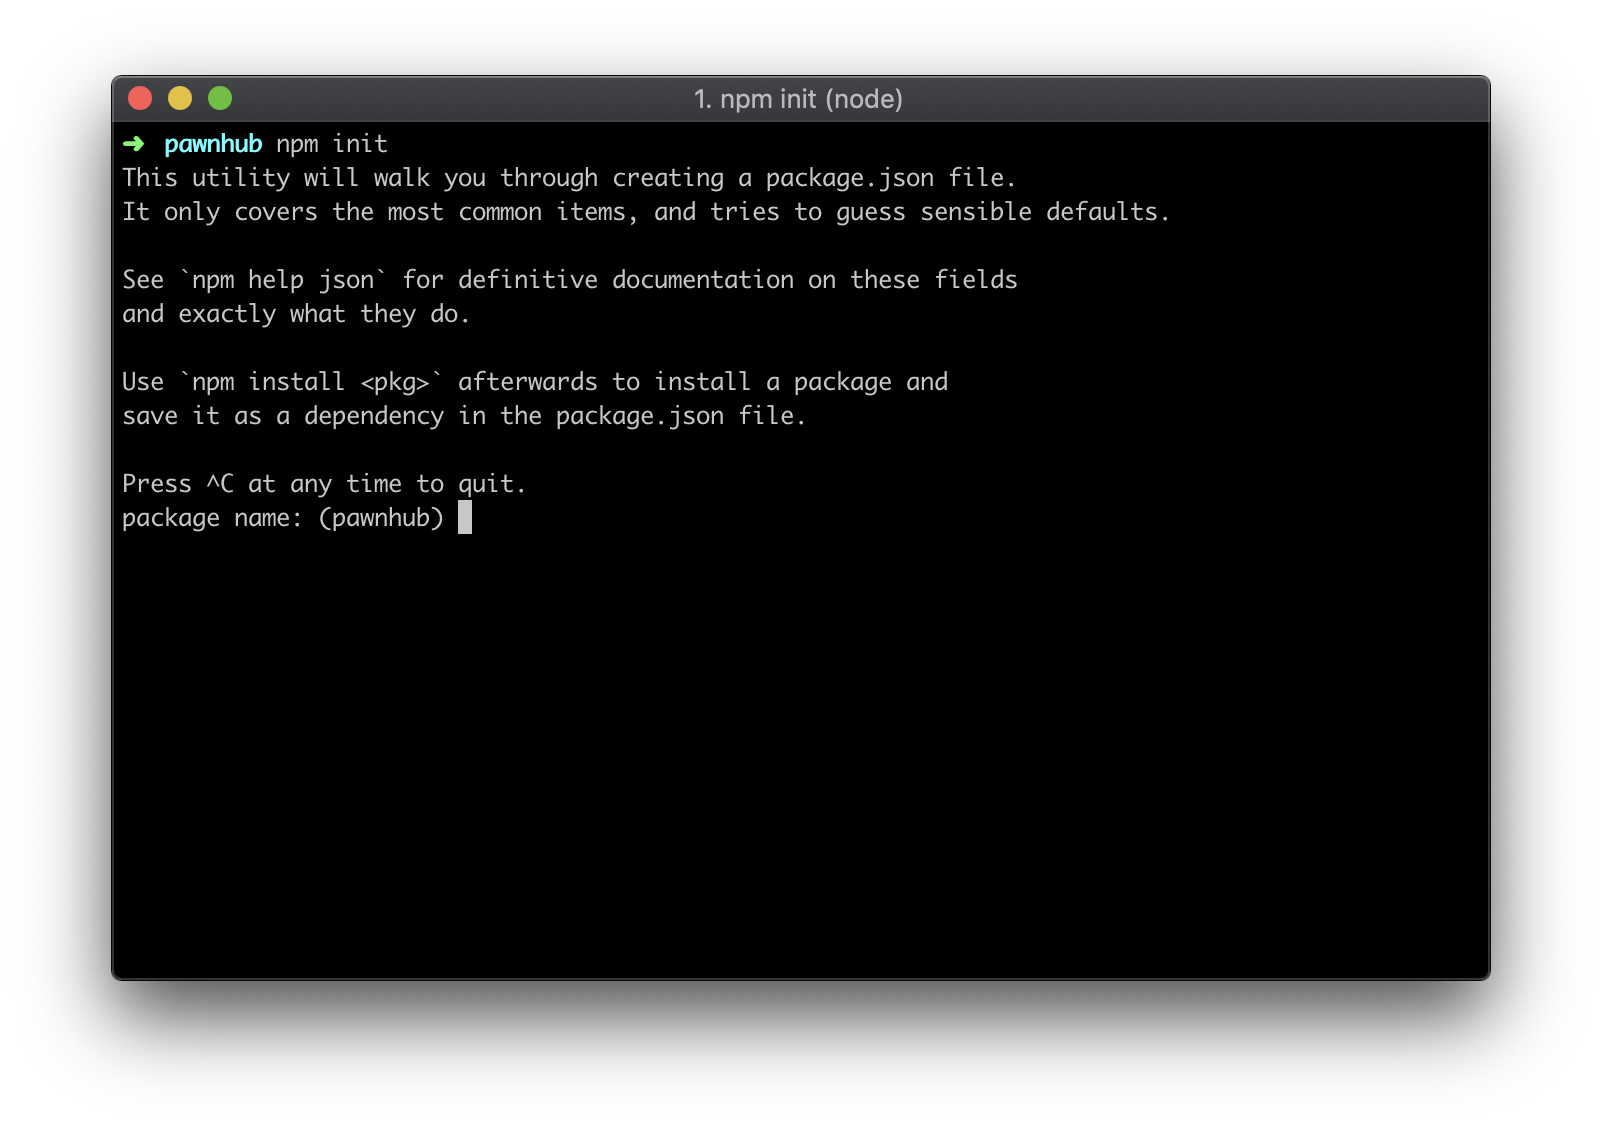
When we fill all the info we will be asked to confirm the information we have just entered.
Next, we need to open the project in our code editor. With Visual Studio Code we can run the command code . which will open the current directory or we can open the Visual Studio Code and press COMMAND+O and open the dir.
You will find that we have only 1 file the package.json. More about the package.json file here!
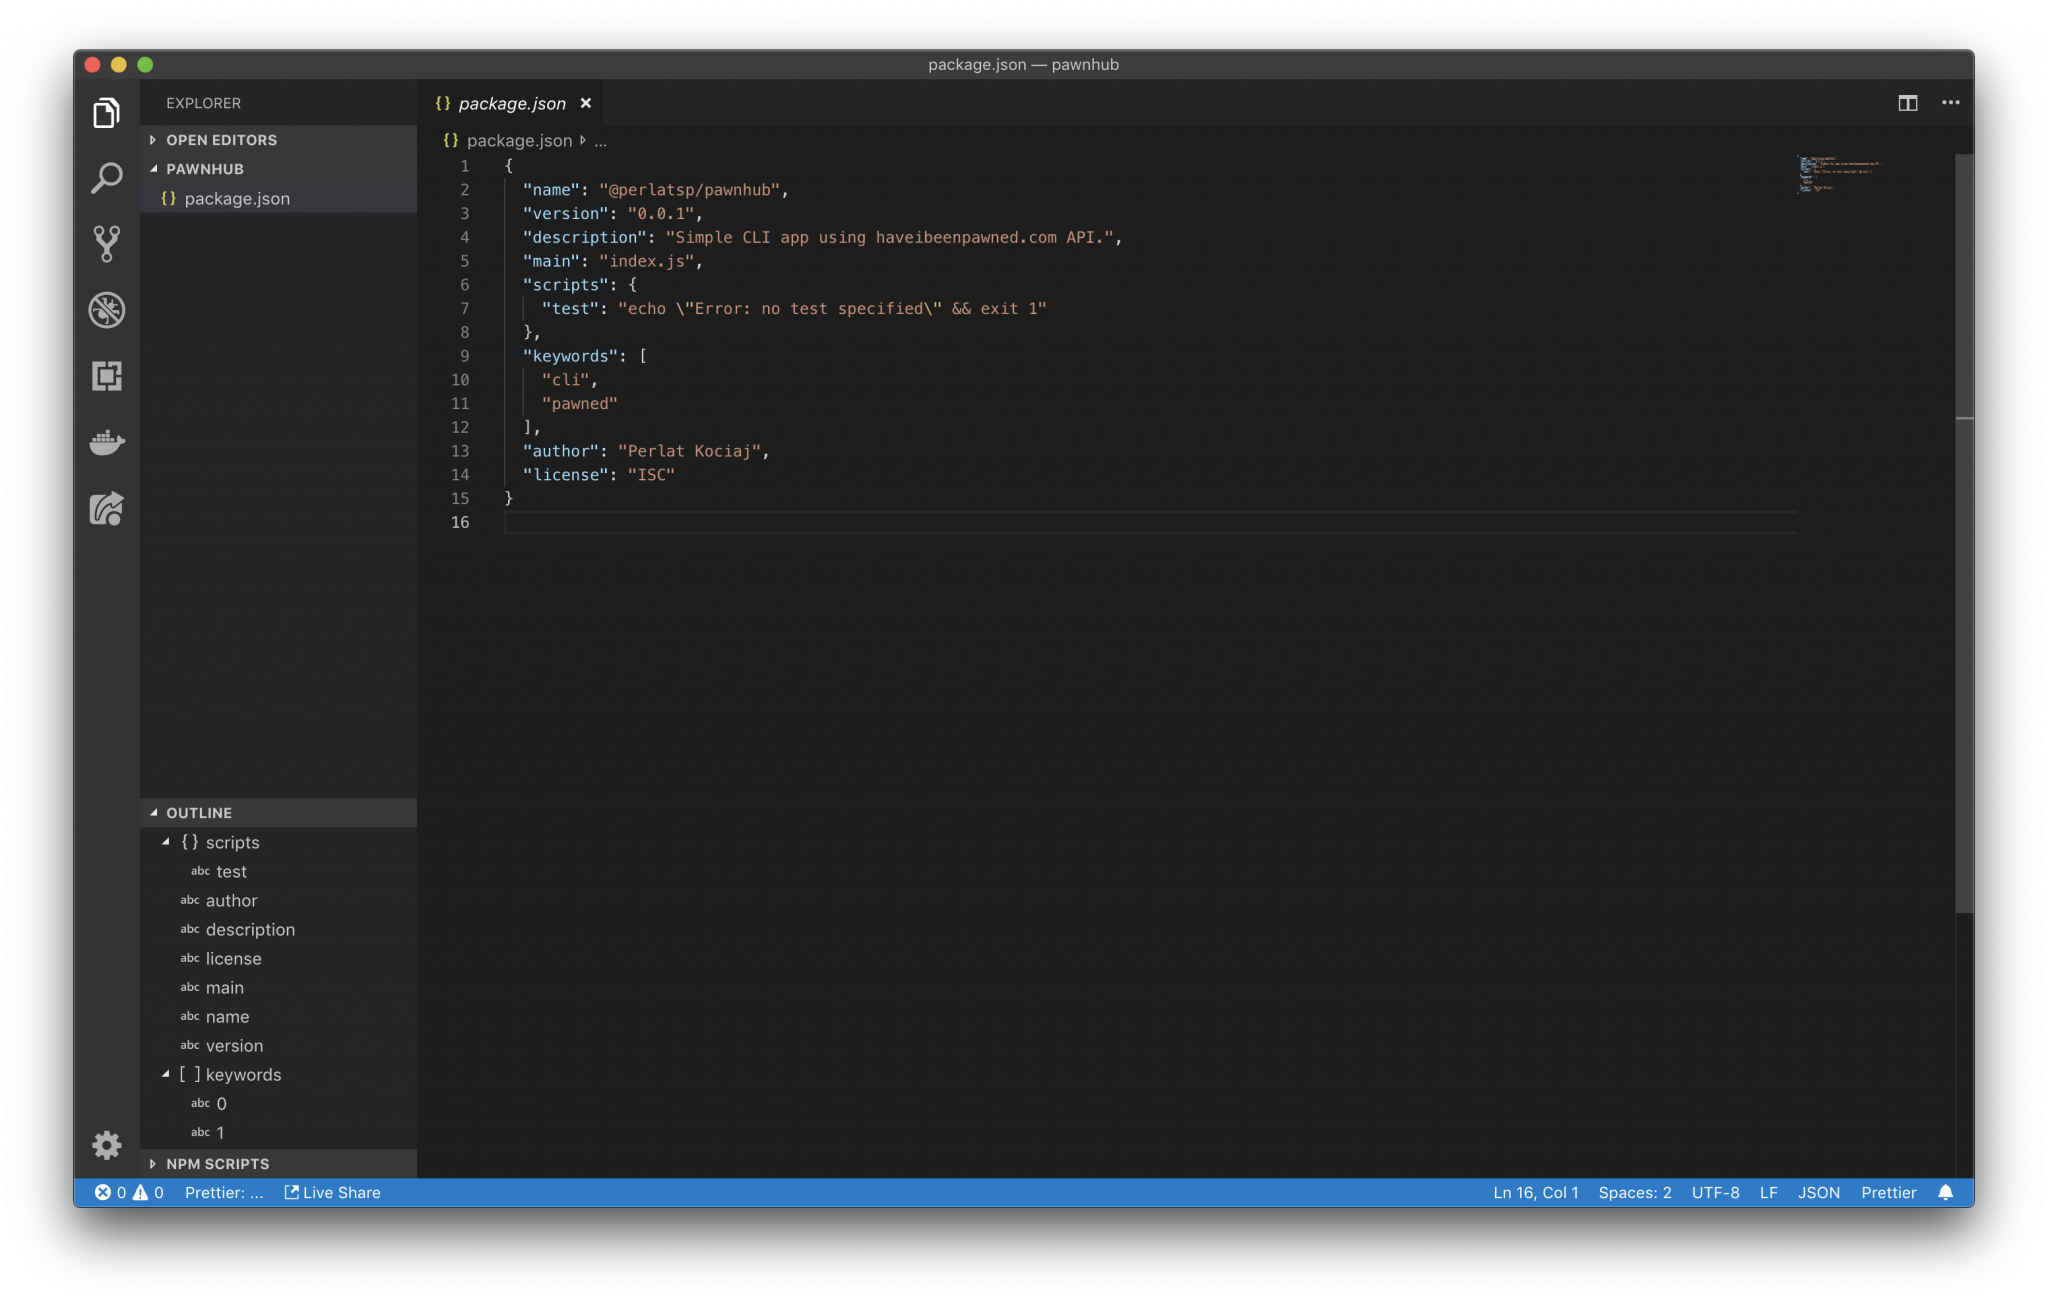
Main File
Our next step is to create the main file we are going to use, the index.js file.
create the file in our root dir touch index.js. Open the file and copy-paste the following :
let message = 'Hello World!';console.log(message)
Running the file is pretty straightforward. Open the terminal and run node index.js this will tell Node to run the index.js file. We should see the following on our terminal.
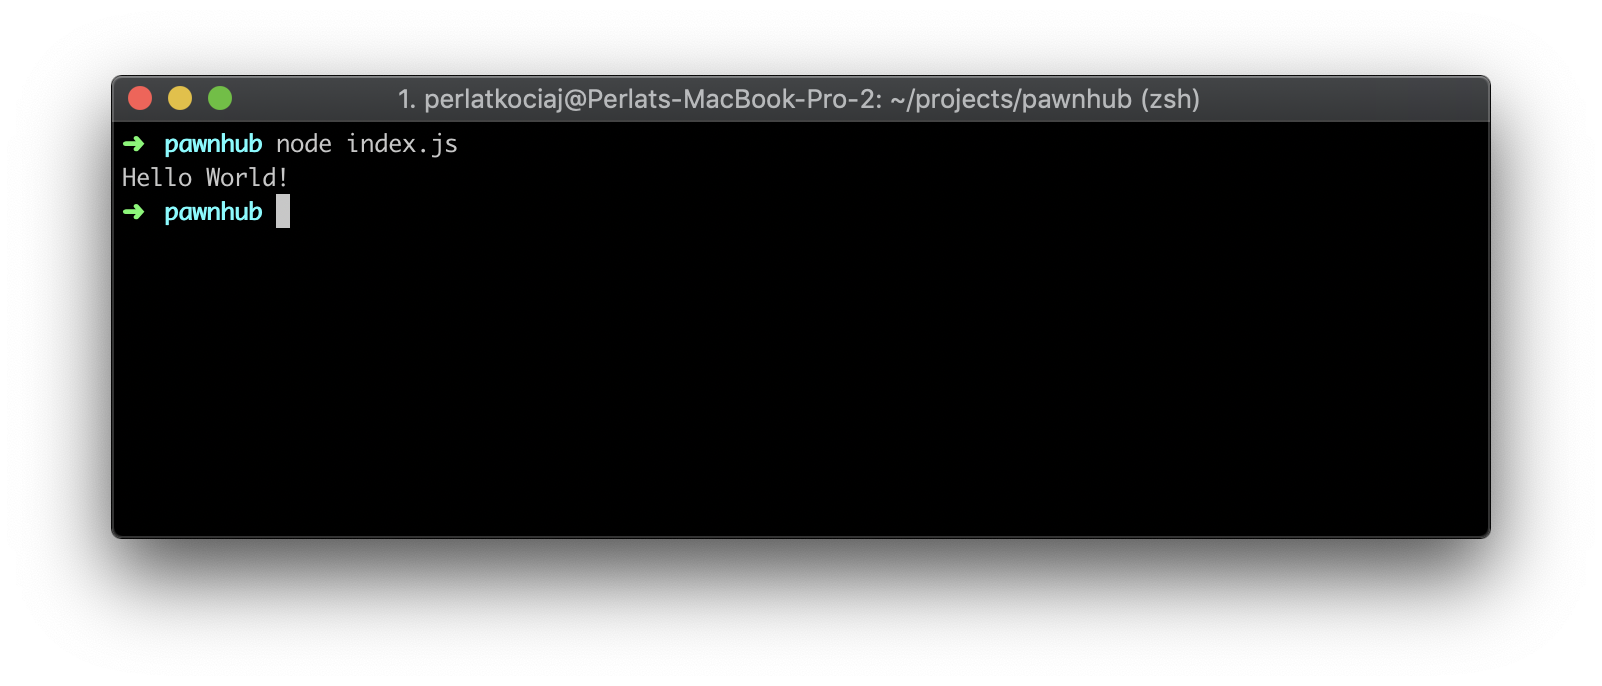
Cool huh? But, it is not dynamic. we cannot change the outputted message! We will learn how to do so in the next section using arguments.
Node Arguments
Normally, when we want to pass arguments we do the following:
node filename argument1 argument2 argumentN.... But the question is, how can you access these arguments ?
The simplest way of retrieving arguments in Node.js is via the process.argv array. This is a global object that we can use without importing any additional libraries to use it. These arguments can be accessed within the application via the process.argv array. Let us start using arguments!
Modify the file to the following:
let message = 'Hello World!';console.log(process.argv)
and run node index.js argument we will have something like the following image.
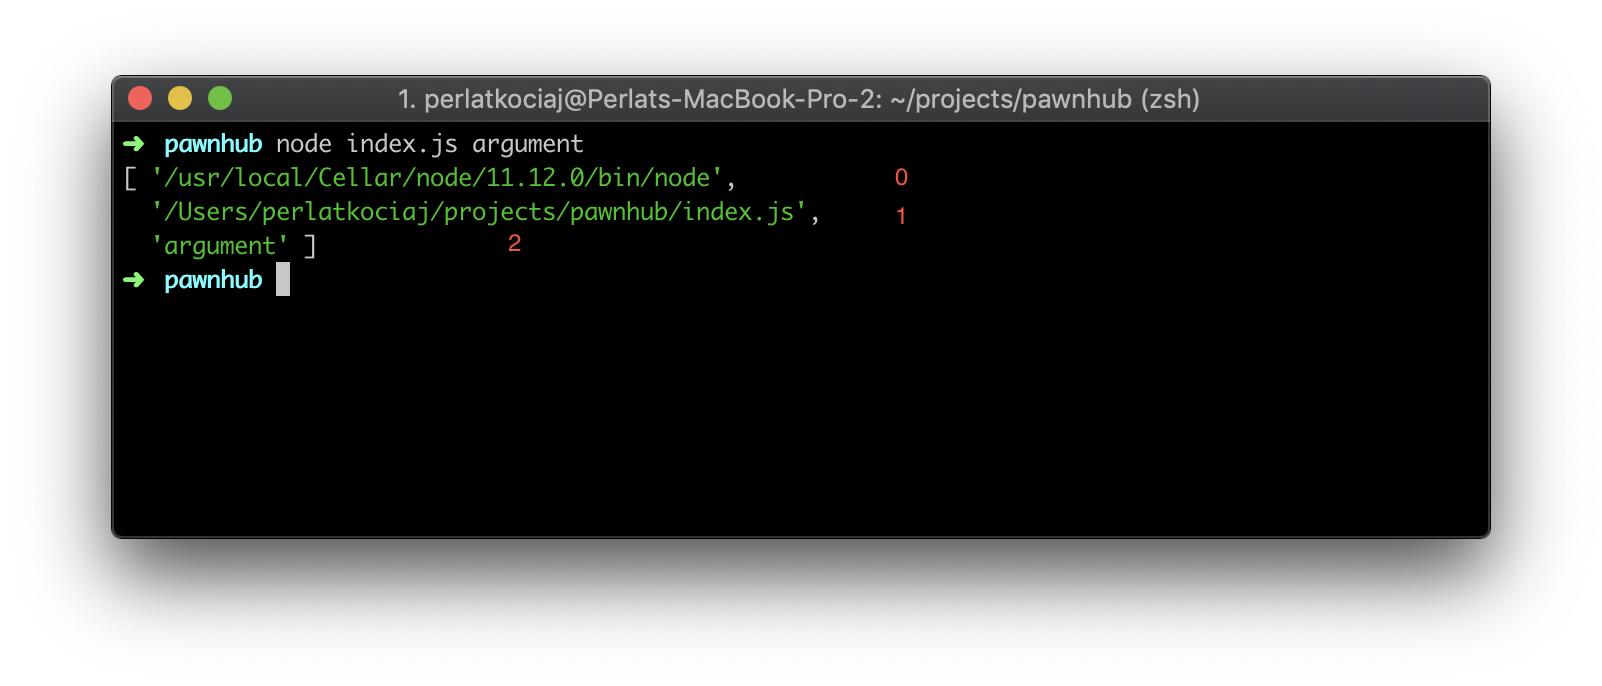
You will have noticed that we have an array with 3 string items. I marked them with 0,1 and 2.
The argument with key0 is the node itself, argument 1 is the file being executed and the last (2) argument is the argument that we will be using in this tutorial.
Ok, so now we need to do something with the last argument. Let’s display a customized message on the console.
change the code to the following:
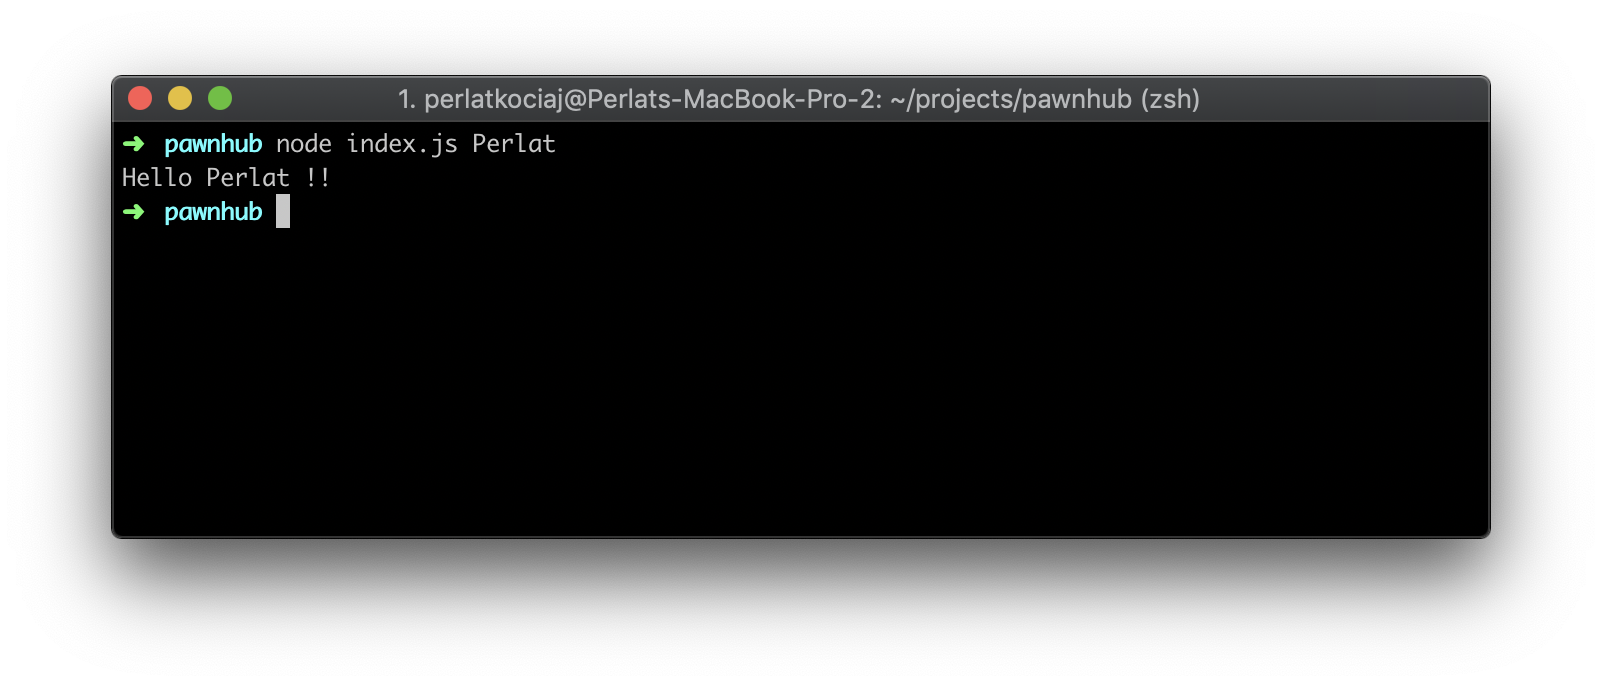
let name = process.argv[2];let message = `Hello ${name}`;console.log(process.argv)
What we did here is we initialize a variable called name have a value from the third (key 2 as we start counting from 0 ) argument of the current process. Let’s run node index.js Perlat (Perlat is my name, so you can change this accordingly)
Make it Executable
So far so good, we have created our simple app, and we can run it by running node index.js name but we need to be inside the directory for this to work. and we need to run every time the node and then the file, and then add an argument.
How can we create an executable that will allow us to run the command from whatever directory?
The answer is node binaries! And we can easily do this by adding a new field in the package.json file, the bin field. More info about the bin field here. Now, add this inside your package.json, I usually add this just after the main field.
"bin":{ "pawnhub":"./index.js"},
By doing so, we say to node that we want to register a command named pawnhub that will execute the ./index.js file upon running it. We can add multiple executables inside the bin file by specifying the name and the file to execute.
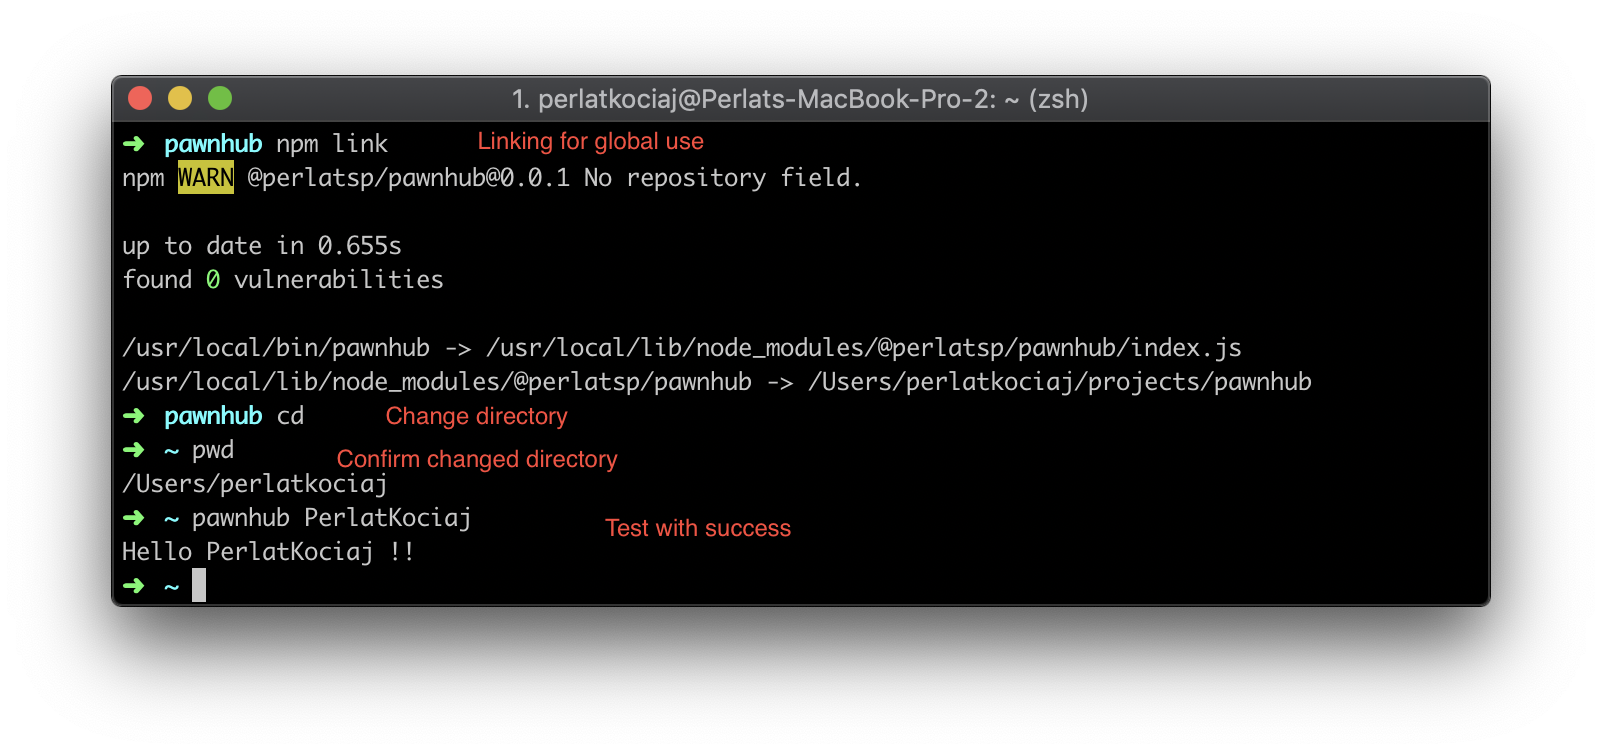
If you are impatient and already ran the command pawnhub name you will get an error command not found: pawnhub this is because the command is not linked. We can do this by running npm link inside our directory, and voila! our package is available symlinked globally on our system! Go ahead an try it. It will fail!
Reason is because we need to add #!/usr/bin/env node at the very top of the index.js file.
By adding it , we are telling *nix systems that the interpreter of our JavaScript file should be /usr/bin/env node which looks up for the locally-installed nodeexecutable.
In Windows, that line will just be ignored because it will be interpreted as a comment, but it has to be there because npm will read it on a Windows machine when the NodeJS command-line package is being installed. Now try again and it should be working fine!
Now we have a package that is acceptin arguments and can be accessed globally. We need to start working on our final package, making the http requests to haveibeenpawned.com website.
Install Axios
What is Axios?
Axios is a promise based HTTP client for the browser and node.js. We can make requests such as GET, POST, DELETE or PUT. we are going to use only the GET request.
More information about axios here.
Because Axios is an npm package we can install it by running npm install axios and it will be installed on our project. Axios can be used in browser applications as well by using a CDN or the path to the file like:
<script src="https://unpkg.com/axios/dist/axios.min.js"></script>
Using Axios
This is a simple GET request using axios! (modified from the example on the official docs)
const axios = require('axios');// Make a request for a user with a given IDaxios.get('ENDPOINT') .then(function (response) { // handle the response when it is a success console.log(response); }) .catch(function (error) { // handle when error ocurrs (eg: 404) console.log(error); })
Using Haveibeenpawned.com API
Go ahead and try the https://haveibeenpwned.com website (HIBP for abbreviation) and check if you have an account that has been compromised in a data breach. We will be using their API to achieve the functionality we desire.
The docs for using the API, for a reference.
Ok, now let’s make a request to HIBP API. Modify the index.js to reflect the bellow code
#!/usr/bin/env node

const axios = require('axios');

axios.get(`https://haveibeenpwned.com/api/v2/breachedaccount/admin@test.com`)
.then(response=>{
     console.log(response.data)
})
.catch(err=>{
    console.log(err)
})
We are calling the API to search the breachedaccount for admin@test.com email.
Now run pawnhub and you should get a big JSON object like the following sample.
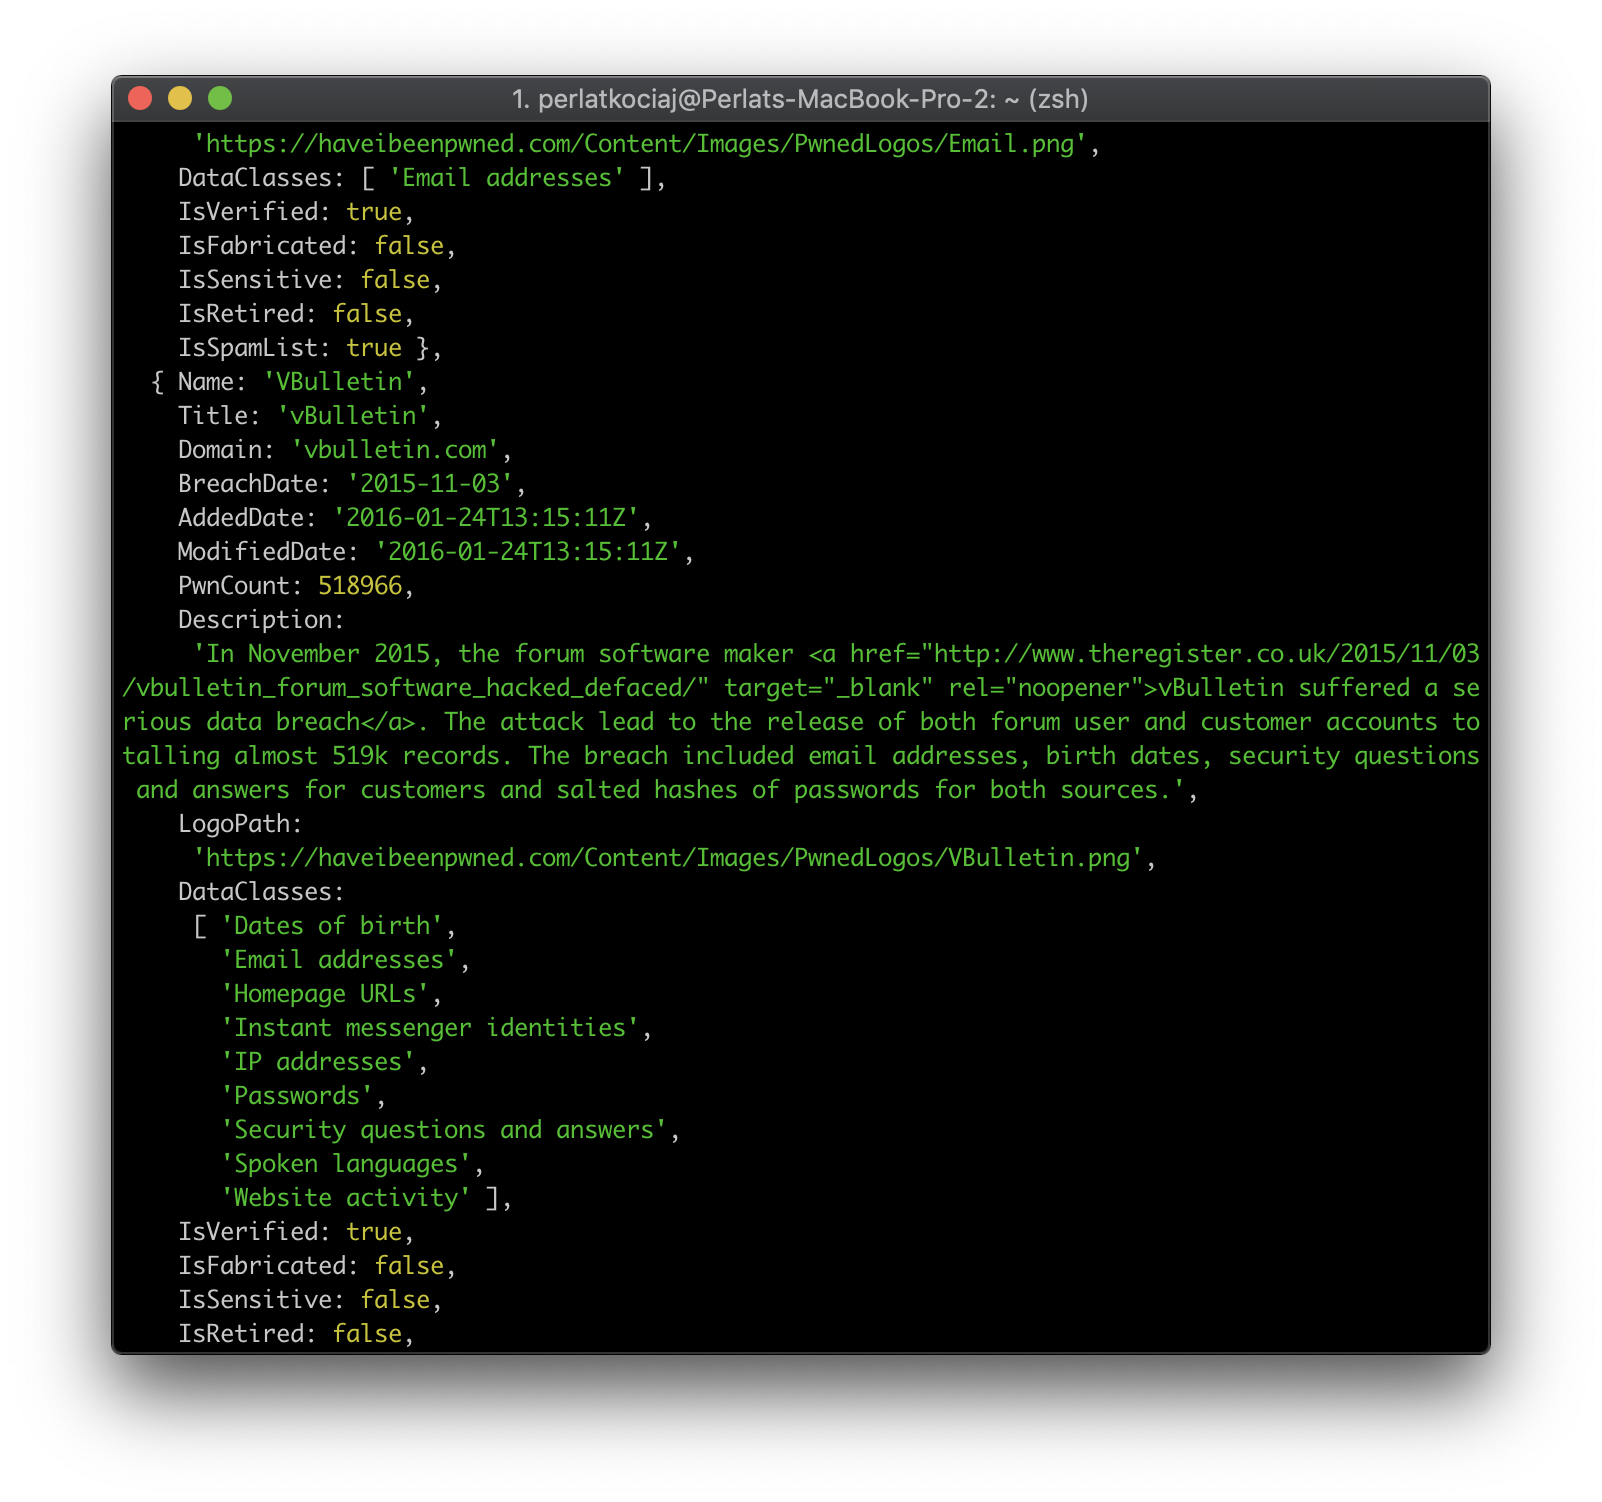
But we don’t need every information from that JSON object…
Lets edit the file to reflect the following:
#!/usr/bin/env node

const axios = require('axios');

axios.get(`https://haveibeenpwned.com/api/v2/breachedaccount/admin@test.com`)
.then(response=>{
let breaches=[]; //create empty array
    console.log(`admin@test.com was found in ${ response.data.length} breaches!`)
    //iterate each breaches to get only specific attributes
    response.data.forEach(breach => {
        breaches.push({
            Name:breach.Name,
            Domain:breach.Domain,
            BreachDate:breach.BreachDate,
            AccountsHacked:breach.PwnCount,
        })
    });
    console.table(breaches) //display in pretty table! :D
})
.catch(err=>{
    console.log(err)//display error
})
Now we should have a better representation of the data we got it should similar to the following:

Great, but this is not dynamic, we have hardcoded the email… How can we change this? Of course by using arguments!
Lets modify the code to the following:
#!/usr/bin/env node

const axios = require('axios');
const email = process.argv[2] || 'admin@test.com'; //get the email from the arguments or set a default value
axios.get(`https://haveibeenpwned.com/api/v2/breachedaccount/${email}`)
.then(response=>{
let breaches=[]; //create empty array
    console.log(`${email} was found in ${ response.data.length} breaches!`)
    //iterate each breaches to get only specific attributes
    response.data.forEach(breach => {
        breaches.push({
            Name:breach.Name,
            Domain:breach.Domain,
            BreachDate:breach.BreachDate,
            AccountsHacked:breach.PwnCount,
        })
    });
    console.table(breaches) //display in pretty table! :D
})
.catch(err=>{
    console.log(err)//display error
})
We did it!
We can now query the API for any email we want by running pawnhub THE_EMAIL@DOMAIN.TLD and check if that email has been compromised! So now what? Well, now we need to do our final step, publish the package on the NPM registry!
Publish the Package
Authenticate
Well, for obvious reasons you need to create an account to be able to publish to the NPM registry!
To create an account in the NPM registry click here.
After creating an account, you need to authenticate our self by running the command npm login, you would be prompted to provide our details, you need to enter the required details and you should log in!
To test that the login was successful, enter the command npm whoami, your username should be displayed to the CLI.
Publish
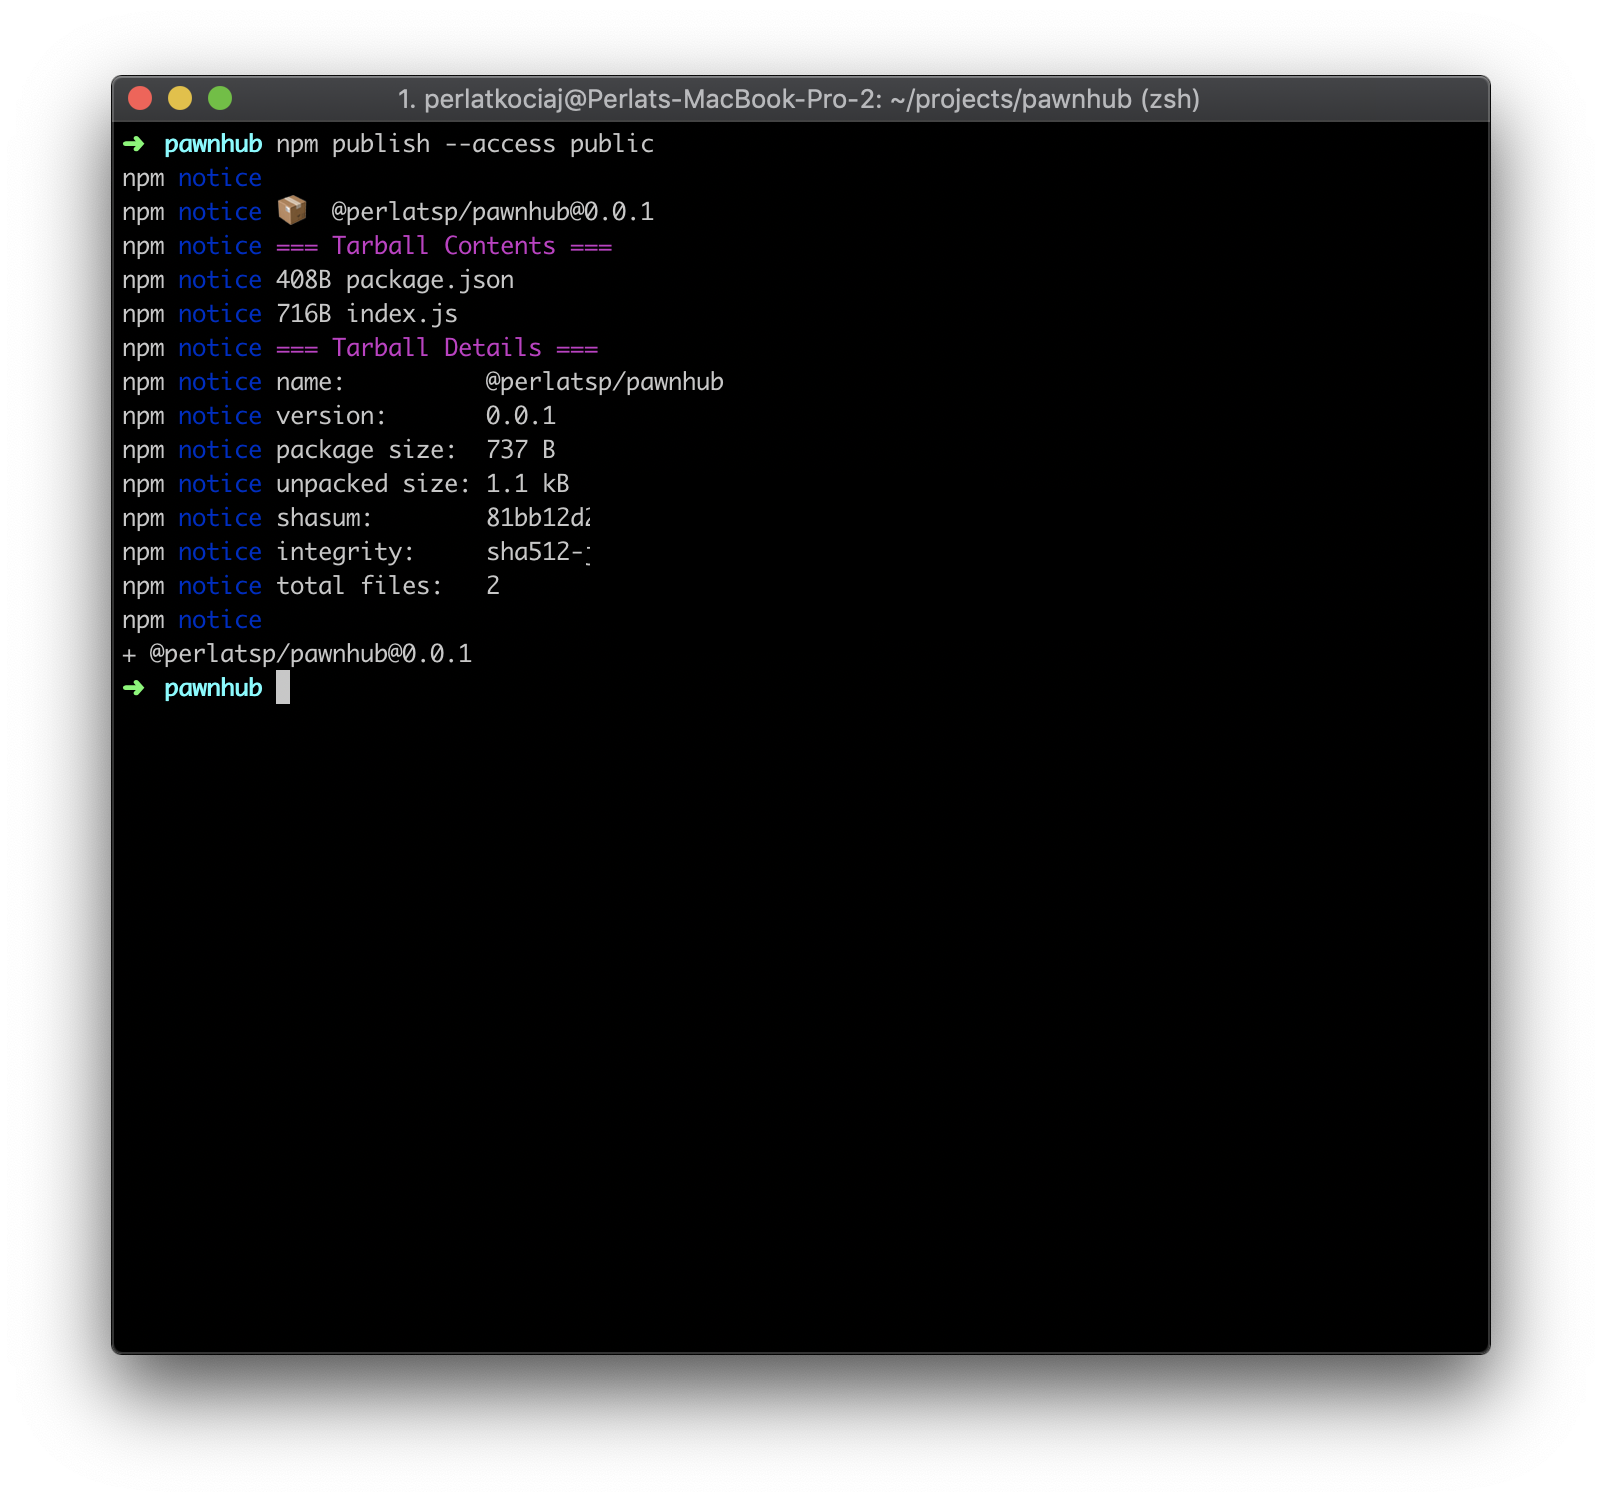
Now the final step for our package to be available for the global community! Open the terminal and run the following inside the project directory npm publish --access public this will publish the package with public access. and will be available on the npm registry. for this example, I have chosen the name to be @perlatsp/pawnhub and is now available here. Make sure that you change the name inside the package.json file!
Boom!💥 Mission accomplished! ✅
We have just learned how to create and publish an NPM package to the NPM registry. The next step is to improve our package by adding more features or fixing any bugs… 🐞
Test the Package
Ok, we have published our package..how can we be sure that everything went as intended?
Now on your terminal run npm unlink to remove the symlink we have created on this step and install our brand new package by running npm install -g YOURPACKAGENAME I am using npm install -g @perlatsp/pawnhub. We just installed our package and is globally available via pawnhub (remember this is the package name that I set, yours should be different. Test it by running pawnhub any@email.com and check the results. For the purpose of this tutorial, we have not done anything for error handling, so in case the email is not valid or does not exist in any databreakch you might get non handled errors.
Now we have just finished this tutorial.
Go and make some create tools and packages! 🙆♂️
Let me know if you have any questions! ❓
If you have followed this tutorial please do comment below the awesome tools you have created!
Join the newsletter.
I'm kind of experimenting with this whole "building a mailing list" thing.
I mean, I heard it's a good practice, so why not give it a shot?
If you're up for it, feel free to drop your email address and who knows, you might possibly receive an update from me someday. Maybe. Or maybe not.
But hey, there's only one way to find out, right?